WHEN YOU FIRST LOG IN
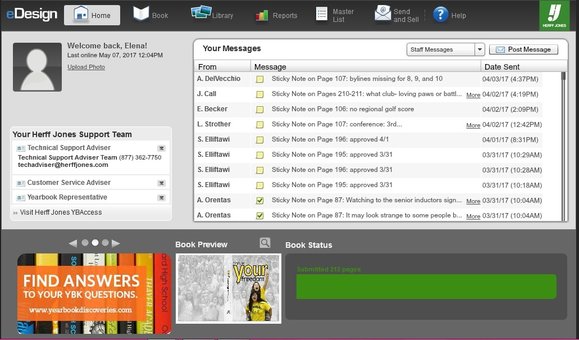
On this screen you can see messages from edesign and from staff members as well as sticky notes. If you click on staff messages and select the drop down to all messages, you will be able to view all messages people have posted here. You can post a message with the button next to it. Encourage staff members to use this feature and check it regularly as well as groupme for notifications and staff messages. The master list, send and sell, and help tabs should only be used by editors, the EIC, and the advisor.
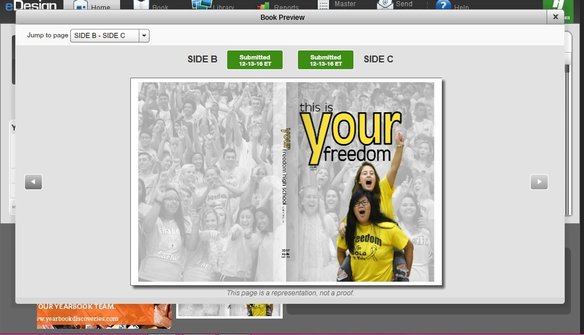
If you click the magnifying glass at the bottom of the screen, you can view the book larger and flip through it without column guides or anything in the way.
BOOK VIEW

From the book view, you have access to all of the pages in the book. On the right hand side you can scroll down and view the entire book. You can also type in a page number in the "jump to" in order to go to a certain page. You can also click the drop down menu that currently says all spreads and select a certain group of spreads. In order to click more than group, you have to go to advance search and you can click more than one group or all of the pages assigned for that deadline. If you click practice pages from this view, you get access to a blank spread that is not part of the book that you can practice design on. PRACTICE PAGES WILL NOT SAVE UNLESS YOU SAVE THEM AS A TEMPLATE. If you get out of the practice page and did not save it as a template it will erase and you will not have access to it again. The color, topics, staff, and deadlines tabs should only be touched by the editors and EIC even though everyone has access to them.
LIBRARY
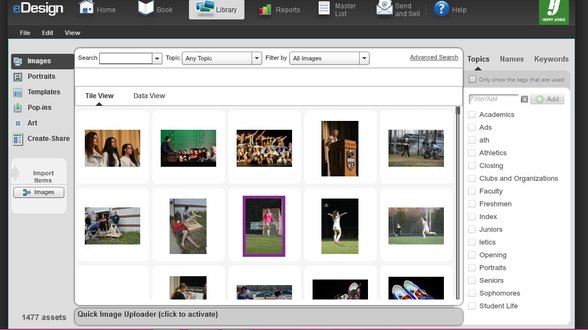
This tab holds all of the pictures. When you want to upload a picture, come to this tab and click the import images button on the right hand side of the page. All of the images will appear here and the most recent ones will appear at the bottom of the list. Do not upload pictures into edesign unless you or your team lead intend on using them on a spread.
REPORTS
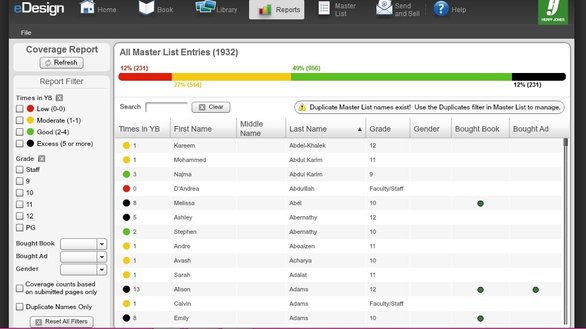
From this tab, you can see who has bought a book and how many times they have been covered. You can also select a certain grade and view the students in that grade. This is a useful tool to have to see if you can cover someone, however you should ALWAYS check with the index editor before you use someone, even if you have looked at this list before asking.
MENU TASKBAR ON A SPREAD
FILE
Save- Use this all of the time.
Save and close window- Saves and brings you back to the book view.
Save as template- Can be accessed as a template but does not save on the spread.
View spread history- You can view who has made changes to the spread and restore a former version if need be.
Back to most recent- Takes you to the most recent version.
Create low and high res pdf- This is important for when you are sending to the principal for prior approval and for printing spreads.
Run preflight check- This checks for spelling, margins, etc.
EDIT
Self explanatory
Run Name Check- This checks all of the names on the spread with the master list and tells you when a name is spelled wrong. You can also right click on a name that is underlined in red to access this feature.
LAYOUT
You shouldn't have to use this
OBJECT
Bring to....- Brings the object to the.....
Effects- Can be used on pictures to make them black and white, sepia, transparent, or have a drop shadow (usually for cutouts if you want)
Lock object- Locks the object in that location so it cannot be moved unless you unlock it. Can also be locked or unlocked using the lock at the bottom left of the screen.
Convert to shapes- This can be used for text to make it a shape to stretch and change the size easier. This is good for bold text in headlines.
Add text to path- You can put text in a line or path that is not a straight horizontal line like usual.
Group objects- You can select more than one object (picture, text, etc.) and group them together to move them together. This is helpful when designing. Can also be accessed by the overlapping squares under the lock in the bottom left.
Tag image- You can do facial tagging to name the people in the picture or manually name them. This is not a required function for pictures or when putting names on a spread.
VIEW
Show frames- Blue lines appear around all items to show their outer limits of the frames.
Hide DPI warning- This happens when a picture is too grainy, but can be hidden when designing. However, make sure you fix the dpi right away after you discover that it is a problem on the spread.
Hide Column Guides- Makes the page blank and without column guides so that you can see what it looks like when it prints.
Show grid- If you are designing something smaller and more intricate, use the grid to design instead of the columns.
ON A SPREAD
LEFT HAND SIDE
First arrow: A pointer tool. Used to select or move objects. If you select this tool and then drag the mouse over several objects, it will select them all.
Text box: Draws a text box with lorem ipsum filler inside of it.
Pen: Allows you to draw objects and other shapes. It also allows you to have text go along that line.
Square: This is the tool used to create boxes for picture. If you click on the carat in the corner of the box you can select other shapes. If you hold down shift while dragging the mouse to make this shape, it will create the shape in perfect dimensions.
Line: Draws a line. If you hold down shift while dragging the mouse to make this line, it will create a perfectly straight line.
Fill page: This allows you to fill the page with a solid color.
Hand: Allows you to move around the spread when you are zoomed in.
Magnifying glass: Allows you to select an area where you want to zoom into the spread.
Book: Brings you back to view the full spread.
Number %: Allows you to manually select the zoom that you want to view the spread in.
Tag: Allows you to nametag the pictures that are on the spread.
RIGHT HAND SIDE:
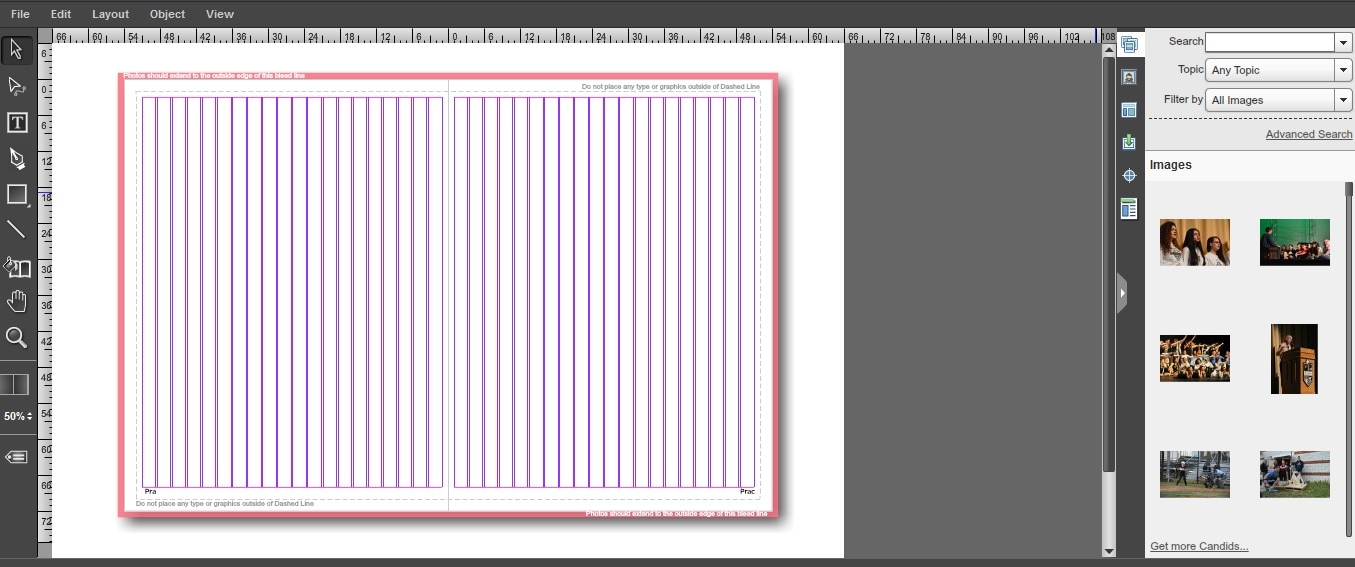
Top icon: Shows the image library. Here you can view all of the images that have been uploaded. If you want to upload more you can select get more candids from the bottom and upload from there. You can also do advanced search to select things such as upload date and tags if you cannot locate a picture.
Portrait: This folder is where all of the portraits are located.
Third icon: This is where all of the templates for spreads can be accessed. To use a template, simply drag it onto the spread that you are working on. If you select that you want to replace existing content, then you will have nothing on the spread except for the template. If you select no to this prompt, you will have whatever was previously on the spread as well as the template.
First arrow: A pointer tool. Used to select or move objects. If you select this tool and then drag the mouse over several objects, it will select them all.
Text box: Draws a text box with lorem ipsum filler inside of it.
Pen: Allows you to draw objects and other shapes. It also allows you to have text go along that line.
Square: This is the tool used to create boxes for picture. If you click on the carat in the corner of the box you can select other shapes. If you hold down shift while dragging the mouse to make this shape, it will create the shape in perfect dimensions.
Line: Draws a line. If you hold down shift while dragging the mouse to make this line, it will create a perfectly straight line.
Fill page: This allows you to fill the page with a solid color.
Hand: Allows you to move around the spread when you are zoomed in.
Magnifying glass: Allows you to select an area where you want to zoom into the spread.
Book: Brings you back to view the full spread.
Number %: Allows you to manually select the zoom that you want to view the spread in.
Tag: Allows you to nametag the pictures that are on the spread.
RIGHT HAND SIDE:
Top icon: Shows the image library. Here you can view all of the images that have been uploaded. If you want to upload more you can select get more candids from the bottom and upload from there. You can also do advanced search to select things such as upload date and tags if you cannot locate a picture.
Portrait: This folder is where all of the portraits are located.
Third icon: This is where all of the templates for spreads can be accessed. To use a template, simply drag it onto the spread that you are working on. If you select that you want to replace existing content, then you will have nothing on the spread except for the template. If you select no to this prompt, you will have whatever was previously on the spread as well as the template.

When you click on a photo box, this display will appear at the bottom of your screen.
Lock: Selecting one or more objects and then clicking this button will lock them in place so they cannot be moved unless they are unlocked by clicking this icon again.
Layered boxes: This is the grouping icon. If you select 2 or more items together and then click this button it will group them together so that they cannot be separated and will be moved together. This is especially helpful for redesign. If you want to undo the group, simply click the selected object and then click this icon again.
Coordinates: These coordinates will tell you exactly where a picture is placed on a spread. If you want a picture placed in the same spot on every spread, you can manually type in the coordinates of where you wish for the picture to go.
Angle: This allows you to rotate the picture or pictures and put it at an angle.
Pencil: This is whatever color the outline of the box is. If you do not want an outline, you need to change that for every picture on the spread to the white box with a red slash in the middle. However, if you want an outline, select the color you want and then you can adjust the thickness with the box to the right of the pencil.
Paint can: This shows you what the color fill of the box is. It can be helpful when doing a mock design, but make sure that when you are done designing that the fill is changed back to nothing, the white box with the red slash through it.
Arc (next to paint can): This feature allows you to edit the shape of the image. With this, you can round the corners to whatever degree you wish. Also, if you click the carat in the corner you can select more options to do similar things.
Triangles: These allow you to flip the image, which you should never do because it is not journalistic integrity.
Next to triangles: These options allow you to bring the image in front or behind the text that it is next to.
