step 1

When you enter the project, click book setup in the top right corner. This screen will appear. Click none.
step 2

Select the fonts that you want to use for your book. See the section on fonts under the style sheet tab if you have questions about which fonts to pick.
step 3

This is the best part of setting up the book. Once you have a style sheet written, this part should be easy. You can create different character styles and rename them for every different style element. This will help make sure that the fonts are consistent throughout the book. When you are on a spread and want to use a character style, they can be selected right next to where you change the font.
step 4

On this step you can insert theme colors and name them which is super important if you are doing a color palette. You can also insert more colors later when you are on a spread if you're doing pull colors but it's harder to go back and name the colors that are theme specific.
STEP 5

This is the next important step. From this screen, which can be accessed later on if you need to change or add deadlines, you can set the deadlines for spreads. Once you pick the dates, that have been given to you by the Herff Jones rep, they will appear on the left side of the screen. I recommend setting the deadlines a week before the actual deadline so that there is time to ensure everything is done correctly and ahead of time so that you can ensure that you make the deadline. It is also helpful to send in pages as soon as they are done so that you can get early days.
STEP 6

This step is also important because it allows you to actually set up the book. On the left, you need to make sure that it has 20 columns per page and 0p3 spacing. Everything else on this page needs to be matched (especially the left hand side) and also make sure that the box is checked for name preferences.
STEP 7

This page is a great resource. Like any of the other tabs, it can be accessed and changed throughout the year. Before portraits are flowed into the book, I would change the low coverage to 0-0 and moderate to 1-2. This way, you can separately see who has not been covered. Once portraits are flowed and club pictures or sports pictures are in, I would go back through and change to what is on the screen.
FOLIOS
Once you have a theme and theme elements, you can design your folios. Folios are the things in the bottom corners of the page that have the page number and what content is covered on that page. You can choose to include a design element in the folio (WAIT YOU'RE GONNA NEED THIS) of just have the number (this is your freedom).
STEP 1
STEP 2
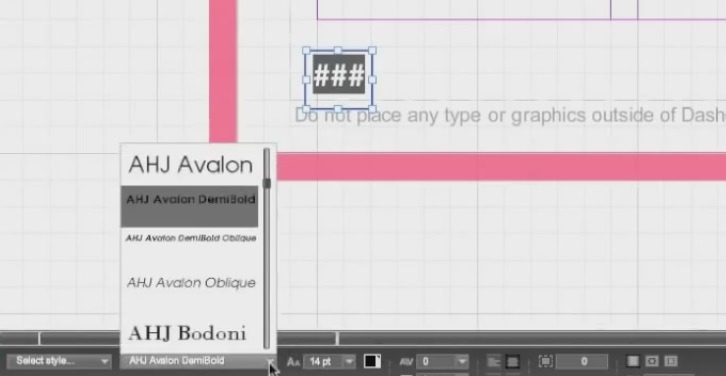
Change the font of the folio and the size of it to something that reflects your style sheet.
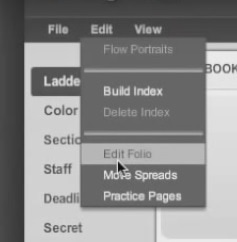
step 3
Click layout on the top menu bar. Then go through and click enable left page number, enable left section, enable left topic, enable right page number, enable right section, and enable right topic.
STEP 4
If there is a design element that you want to be in every single page, then you can insert it now on the left and right side. Make sure it is lined up on each side and exactly the same. Only do this if you want this to appear on every single page in the book. If you want to do something like the folios in WAIT YOU'RE GONNA NEED THIS, where the color changes on each spread, you have to go through and manually put it in on every spread and have the exact dimensions written down where the box or whatever goes on each side (this can be seen on edesign). Also, if you are putting something in, make sure you account for design on double AND triple digit number pages. The triple digit number pages will be different and may need the boxes or whatever element in a different space because they go farther out.
